Uncategorized

Sourdough Chronicles : Part 1

Times are uncertain right now.  I find myself baking more than ever, mainly to utilize the sourdough starter that is taking over my kitchen. I refuse to waste anything. When people started panic buying and I realized that there was a good chance I’d be baking the goods our family needed, I wasn’t too worried.  I always keep flour, sugar, yeast & eggs on hand.  But not knowing how long this isolation is going to last, I decided to throw together a sourdough starter.

Many don’t know that you don’t need yeast when using sourdough in recipes.  The natural wild yeasts from the fermented mixture of flour and water work on their own without the addition of yeast.  I will admit that I prefer sourdough recipes with yeast because, well I’m a baker, and I like that puffy rise. But it certainly isn’t necessary.

Because I don’t like discarding and wasting anything, especially flour, I have offered to share my starter with locals.The hardest part of sharing with people is not being able to help them when they look at their starter and wonder what in the heck they’re going to do with it.

I decided to throw together a series of posts to help people understand more of what they’re getting into when they decide to take on a sourdough baby. 🙂

Some things you need to know:

  • Feed and water your sourdough start as if it were a pet.  You’ll soon become acquainted and you will know exactly what it wants.
  • I find that if you name your starter, it makes it easier to build that relationship with your starter.  If you have kids, let them be part of naming your starter and then they will also be intrigued and wonder when he/she needs to be fed and taken care of. (fun project for homeschooling right now)
  • Your start will become more sour the longer you have it.  If you don’t plan to use it often, keep it in the fridge. Take it out and feed it once a week to maintain it.  Let it come to room temperature and start to activate before using it in recipes.
  • If your start separates and there’s a liquid, do not throw it away. Stir it in!  That liquid is a combination of the acids and natural yeasts.  If you throw it away, you take away all the hard work your start is achieving. As long as there’s no mold growing, your start is good!
  • ALWAYS PLAN AHEAD. Some sourdough recipes require overnight fermentation.
  • Use plastic or glass containers to store it in. Never use metals, including spoons or forks to stir it. Use plastic or wooden utensils.

The uses for sourdough are endless.  Some things I have tried are:

We like our pizza on the well-done side. No soggy cheese for me! 


Worst picture ever. Sorry.


Minus the Raisins 🙂

Baking with sourdough has a learning curve.  Not everything will come out perfectly like you see on Pinterest.  But even if they don’t look perfect, chances are they’ll still taste amazing. Be proud that you can still feed your family at very minimal costs and that it tastes great.

Hydration is something many will discuss when you get a bit more serious about sourdough. I keep it simple and do 100% hydration, meaning I use equal amounts (by weight) of flour and water to my starter.  This just keeps the starter at a consistent hydration point, so it’s neither too runny or too heavy.  But honestly, if you follow the rule of feeding your starter with 3/4 cup + 2 Tbsp of flour and 1/2 cup water then even if you have more starter than that, you will still get a good bulk and consistency with your starter.

I am by no means an expert. I have baked with sourdough my fair share, but some of this stuff on the internet puts my goods to shame. I don’t care. I don’t have time for all that comparison stuff and my brain prefers to keep things simple and just be thankful for the things I am able to make.

If you aren’t getting a start from me, you can start your own.  I have followed several methods in the past.  The one I have liked the most because it has less discard is from the Kitchn.  You can find it here. After your first week you should be able to use it in your baking. If you want to look into a different option that doesn’t bulk up, this is the one I’ve posted before that I’ve used.  Both work great. It’s all about personal preference. Once your starter is established you can slow feedings to once a week or less by storing it in your fridge. If you’re not using it alot you can go months between feedings if its in your fridge.  I use mine far too much for that, but it’s good to know you can keep those natural yeasts at bay until you need them.

Also, please note that forgetting a day of feeding is not the end of the world. If a grayish brown liquid rises to the top, it just means it’s hungry. Do not throw it out! Stir it in and feed it as normal and watch it bubble. Just know that leaving your starter in high heats or neglecting it at room temperature can kill your starter. Nobody wants a dead starter.

I hope this isn’t an overload of info but that it helps you understand a bit more what you’re getting yourself into when acquiring or developing a sourdough starter. 🙂

Stay safe. Stay home. Bake.

Happy Cooking!

Teauna


Uncategorized

Bagel Dogs with Honey Mustard

If you’re wanting a fun and simple meal for dinner, these Bagel Dogs are what you’re looking for!

This recipe made 13 bagel dogs. I used 3 ounces of dough per sausage. 

I used smoked polish sausage but you could also use your favorite hot dogs.

It took me about 2 hours from start to finish so that should give you an idea of what time you may want to start mixing up your dough.

You could also make the dough ahead of time. Just make sure to punch it down once it has doubled in size, then place it in the fridge. An hour before you plan to make them, pull the dough from the fridge to let it come to room temperature.

Bagel Dogs & Honey Mustard

Ingredients

  • 1 1/2 cups warm water
  • 3 teaspoons sugar
  • 4 1/2 teaspoons active dry yeast (2 pkgs)
  • 2 teaspoons salt
  • 4 1/2 cups all purpose flour
  • 2 Tablespoons butter, melted
  • 12-13 hotdogs/ sausages
  • 12 cups water
  • 2 Tablespoons baking soda
  • 1 egg, beaten
  • toppings such as sesame seeds, everything but the bagel seasoning, dried onions, etc,

Instructions

  1. Mix together the warm water, sugar and yeast in the bowl of a stand mixer. Let the mixture sit for 5 minutes or until yeast has started to bubble.
  2. Add the flour, salt and butter to the yeast mixture. Place the bowl on a stand mixer fitted with the dough hook. Mix the dough on medium speed for about 5 minutes, until the dough forms a ball that pulls away from the sides of the bowl. If the dough seems a little dry, add a bit more water (1/4 tsp at a time)
  3. Remove the ball of dough from the bowl; spray the bowl with cooking spray and return the dough to the bowl. Cover with plastic wrap.
  4. Place the bowl in a warm area until the dough has doubled in size, about an hour.
  5. Preheat oven to 450 degrees. Line two sheet pans with a silicon baking mat or parchment paper.
  6. In a large pot, combine the 12 cups water and baking soda and bring to a boil. 
  7. Place the dough on a floured surface and divide into equal pieces. Each piece should be about 3 ounces. 
  8. Roll each piece of dough into a rope about 10-12 inches long. Wrap the dough around each dog, pinching the ends of the dough together to seal. Place the hot dogs on the lined sheet pan.
  9. Using a slotted spoon, dip each wrapped dog into the boiling water for 30 seconds. Place back onto sheet pan.
  10. Brush bagel dogs with the beaten egg. Sprinkle with your favorite topping…or don’t. The choice is yours.
  11. Bake until deep golden brown, about 15 minutes.


Honey Mustard

  • 1/2 cup mayo
  • 3 Tbsp mustard
  • 2 Tbsp honey
  • 1 Tbsp vinegar
  • 1/4 tsp black pepper
  1. Mix it up with a wire whisk and serve with bagel dogs!


http://www.becauseican.me

Happy Cooking!

Teauna

Uncategorized

Oatmeal Cake

Oatmeal Cake is one of my most favorite baked goods of all time! The cake is the perfect texture with the right amount of spice and flavor and the frosting… well, it’s so dang good! All the crunch of walnuts and coconut in that sweet delicious brown sugar sweetened goodness.

Oatmeal Cake

I’ll be honest, if I make the cake for us, it will not last more than 3 days. We love it enough to just keep a fork in the pan and grab a bite as we pass through the kitchen. Sorry not sorry.

My grandma used this recipe to bake up my parents’ wedding cake.

Mom Dad Wedding Cake

I can’t remember a year that this hasn’t been my dad’s birthday cake.

This is also a simple recipe for a build confidence in a newbie baker, as it looks far more difficult than it is and it’s impressive.

I have used this recipe to make cupcakes, wedding cakes and a 9×13. The 9×13 is my favorite because it’s just the classic I grew up with.

Oatmeal Cake

Cake Ingredients

  • 1 1/2 cups boiling water
  • 1 cup quick cooking oats
  • 1/2 cup butter
  • 1 cup brown sugar
  • 1 cup sugar
  • 2 eggs
  • 1 1/2 cups flour
  • 1 tsp. baking soda
  • 1 tsp. cinnamon
  • 1 tsp. nutmeg
  • 1/2 tsp. salt
Frosting Ingredients
  • 6 Tbsp. Butter
  • 1/4 cup brown sugar
  • 1/2 cup sugar
  • 1 cup coconut
  • 1 cup chopped walnuts
  • 1/4 cup evaporated milk
Cake Directions:
  1. Pour boiling water over oats and set aside.
  2. Cream butters and sugars. Beat in eggs. Stir in soaked oatmeal.
  3. Sift dry ingredients. Add to wet mixture.
  4. Pour in greased 9×13. Bake at 350 degrees for 30-35 minutes. Cool in pan.

Frosting Directions:

  1. Heat all ingredients until they’re bubbly.
  2. Stir in 1/4 teaspoon vanilla.
  3. Spread on cake.
  4. Put in oven on broil until bubbly.
  5. Let cool.

http://www.becauseican.me

Much love,

Teauna

Uncategorized

My Favorite Things: Plum Deluxe Tea

There are so many different things I use daily that I often think I should share with my friends but I overlook it. So I decided I need to start making quick blog posts highlighting a few of my most favorite things.

I love tea! It wasn’t until last year that I learned how stinking good tea can be. My mom gave me a box of tea from Plum Deluxe for my birthday and it changed my life.

Plum Deluxe offers a bunch of different blends so you can have the most flavorful teas ever!

I mean seriously…. doesn’t that look amazing?

I have loved every single one I’ve tried! And I LOVE the elderberries!

Because I love them so much, I have even become an ambassador for them! I seriously love them that much. All this means is that I get to brag about their products and when my friends purchase using my link I get a bit of money that I use to buy more tea!! Win-win!

First, follow this link:

https://plumdeluxe.idevaffiliate.com/205.html

You can order just the kinds you’d like to try…

Or

You can join their Tea of the Month Club starting at just $10/month or gift it to someone you love!! Seriously one of the best gifts EVER!!

They have some cute gift packages too!

Some of my favorites are:

Soul Warmer Herbal Tea

Pears and Cinnamon Herbal Tea

Apple Cinnamon Warmth Black Tea

Just Elderberry Herbal Tea

If you have a goal to do something healthy for yourself, this is a great way to do that without breaking the bank!

Lots of love,

Teauna

Uncategorized

Finding Teauna….part 1

“Rest and self-care are so important.  When you take time to replenish your spirit, it allows you to serve others from the overflow. You cannot serve from an empty vessel.” – Eleanor Brownn

You have one chance to live your best life. One chance.  Now. . . just for a minute let that sink in.

Are you living your best life? Do you feel good?  Do you smile? Are you happy? Do you love your life?

We all go through ruts.  It’s okay.  I believe that’s how it’s meant to be. After all, we have to learn somehow. Right? But how long do we have to feel awful before we decide it’s time to take care of ourselves and feel better? What makes us think that things will get better if we just wait it out?

I think we try to be strong for everyone else.  As a mother, a wife, a WOMAN, I will speak for myself and say that I’ve always worried about taking care of everyone else first.  My health has always been placed on the back burner because all those people I love needed attention first. And that was okay.  It was all part of my learning process.

When I realized that I couldn’t continue taking care of others because I wasn’t going to last much longer the way I was feeling, I was called selfish.  I was told I was an awful mother, an awful person. But I kept pushing through.  It has taken me years to find my laughter, my smile, my zest for living and my health.  It made me realize the “who” and “what” in my life that I actually NEED.  I learned that no matter what you do in life you will NEVER make everyone happy.  Sadly you have to make the choice to take care of yourself first. Make yourself happy first. Those that are happy for you will stay with you. And honestly who has the energy to try to make everyone else happy?

The time in my life when I needed to be loved the most I had a limited number of peoples that loved and supported me. That’s okay.  It just made my circle smaller and stronger.  My dear friends turned into the family I needed. Those that matter the most will be there for you to help you every step along the way.  After trying so hard to impress and help out everyone my whole life, I learned the hard way that I don’t need the approval of anyone. Those who I thought would/ should love me through it all judged the hardest and left me to fend for myself during my hardest time of my life, all while talking shit about me and putting me down to others. Awesome huh? And people wonder why I love animals so much….?

I chose to turn my anger, heartache, and energy into taking care of me. I researched the HELL out of health issues and the problems I was having.  I found doctors that were willing to help me without just wanting to hand out limitless prescriptions with all sorts of side effects that just seem to cause yet more issues. I knew what I wanted and I made it known.  Two doctors I visited didn’t make the cut.  They weren’t willing to dig deep and figure things out.  But because I was so picky and told them what I needed they were able to be honest with me and tell me whether or not they were willing to help me.

After my hysterectomy in March 2017, my health was better in ways and it went downhill fast in other aspects.  Holy cow…. I was depressed.  I didn’t realize it at the time but when I look back I realize what a mess I was.

The one thing it all boils down to…… HORMONES. Hormone imbalance.

I didn’t leave the house for weeks, sometimes months at a time.  I worked from home at the time, so I didn’t have to get dressed and brush my hair in the morning and I had my dogs at my feet keeping me company.  My husband was working night shift so I had to be quiet while he was sleeping and make sure that he was getting a good rest to wake up and go back to work, so I would go in my office, shut the door, get on the phone and do my work. I’d take breaks to throw laundry in or do dishes.  I kept my house clean. But I was miserable.  I didn’t feel well and if I had allowed it, I would have slept for hours and hours every day.  I was so tired. Exhausted actually.  My body ached everywhere. I was gaining weight like mad.  Then I started getting these awful headaches.  I will NEVER forget the first of these headaches I had.  I honestly thought I was going to die. Literally die.

I was sitting on the couch visiting and laughing with my daughter and this headache hit so suddenly.  The left side of my head suddenly was in so much pain that I was sobbing. My ear ached, my jaw was locked and my eye felt as though someone had removed it from my face, threw it in the freezer and thrown in back in my face, frozen and at full force.  I instantly got an awful stomach ache and ran to the bathroom.  I was throwing up with such force that it cause my nose to start bleeding.  My poor bathroom looked like WWIII.  I just figured it was a migraine so I took a pain killer and went to bed.  I woke up with the same headache so I called my son and asked him to take me to the emergency room.  This was a big deal.  I’m independent.  But I didn’t think I could make it on my own.

Long story -short…. they did a CT scan and all they could see was inflammation.  They were worried I was having a stroke.  No signs of a stroke.  I was put on medication for “cluster headaches”.

I was sick.  The headaches were unpredictable and would come on without a warning. While the medication helped the headaches some, the side effects were absolutely ridiculous.  They caused my body aches to worsen. And they gave me a serious hangover. When I would take one, my husband would tell me to just quit talking.  My brain would be thinking one thing and something completely different would exit my mouth.  I made no sense.  I would forget to swallow my own spit and I’d drool.  Embarrassing. Several times I had to go to the hospital because even the pills weren’t helping so they’d have to give me a shot and leave me in a dark room.  Sometimes the first shot wouldn’t help and they’d have to give me a narcotics shot.  Then I’d have to call my husband to drive down and take me home. Bless his sweet loving heart.  I always tried to not bother anyone but for the first time in my life… I had to ask for help, not be the one to help.

This is when I began to research. Everything kept coming back to hormones.  After my hysterectomy, my doctor told me I’m young enough that I should be fine.  He said hormones would work themselves out. Little did he know.

I dealt with it for over a year.  I learned some headache triggers.  Strong scents…especially pine, stress, lack of caffeine, noisy environment. The doctor changed my script to injections.  The side effects weren’t as awful.  I got pretty damn good at giving myself a shot in the stomach. It was my new normal.

It didn’t need to be.  But I didn’t know better. I am sharing this with you so you know better.  You do not need to work through feeling like you’re about to the end of your rope.

After researching for months upon months, I finally started calling around to hormone specialists.  We are required to carry insurance as it’s the law. But insurance is not required to pay for hormones.  It is “elective treatment” in their eyes. I call bullshit.  It is a vital part of a human. It’s what makes our bodies run!

After nearly deciding to give up because of the expense that I wasn’t sure I was willing to pay, my darling friend from high school made a post on facebook.  She mentioned that she had found a doctor that had helped her. She explained her symptoms she was having and said he had fixed her.  Of course I wasted no time and I messaged her.  We discussed things and she convinced me to go talk to him.  Not only was he what I was looking for, he was nearly half the expense as the other clinics I had contacted.  And…. he billed insurance for everything he knew they’d pay for.

I called and was given an appointment the next week. I went it and they handed me the paperwork to fill out.  There was this section to fill out all of your symptoms/issues.  There were three different parts within this section.  I pretty much checked the box next to each symptom…. weight gain, headaches, irritability, lack of energy, body aches, blotchy skin, etc.

As I was talking to the doctor I began to cry out of total frustration.  I explained to him that it took every single ounce of energy to get out of bed and get moving in the morning and that it took all I had to get through my work day and drive home without falling asleep from pure exhaustion. (I had started working outside the home in October 2017)  He promised me he would help.  He told me he could tell that I had an imbalance.  He explained to me that it was going to take a while to get things straightened out but that he wasn’t going to stop until I was feeling better.  He kept his word.

That day he put me on bioidentical progesterone.  He told me to start taking it at night and that he was going to call me immediately when he got my blood results so that we could figure out a game plan.

Two days later he called me.  He said he wanted to see me immediately for testosterone pellet implants, he was putting me on thyroid meds and he wanted me to continue my progesterone as I was.  He also wanted me to take vitamins A, D, and B.  So his receptionist made an appointment and I went down the following day.  I got the vitamins from his office and I got my implants.  Not painful at all until the numbing meds wore off.  Then just sore for a few days.  The day after my implants I got one of my headaches.  It was pretty outrageous but not my worst.  I stayed home from work and slept it off all day after giving myself a shot.

After a couple weeks I had my blood redrawn to check my levels.  I had been so low that he doubled my thyroid and progesterone and I had to go for a testosterone booster.  When most people get one pellet implant, I had three.  Three. He told me I was the 1%. My original counts were literally non-existent.  He explained to me that I had been running on adrenaline and my own will to survive.

About a month went past and I was feeling so much better.  I discussed weight loss and he suggested I try the KETO lifestyle and that it worked really well with helping balance out the hormones.

I didn’t have time to take from work and I didn’t have the money to pay for them to help me with the diet part as I was spending everything extra I had on the hormone angle of things, so I decided to bust out my will power and do it on my own.

I started living the keto lifestyle on September 17th, 2018.  After 3 weeks, I went for a checkup and had lost eleven pounds. I just went for my second set of pellets on December 7th and was down another 15 pounds, totaling 26 pounds lost in 12 weeks.

I have done well and I feel well.

I have decided to share my story because I want to help you feel better too.  I want you to know that you don’t have to be miserable.  Do it for you. Those that love you and appreciate you will stand by your side and help you.

And please… reach out if you need to.  I’m not an expert.  But I’ve done my research and I know what has worked for me.  I would be more than happy to help you or help you find someone that could help you the way my doctor has helped me.

XOXOXO,

Teauna


Uncategorized

French Onion Dip

french onion dip
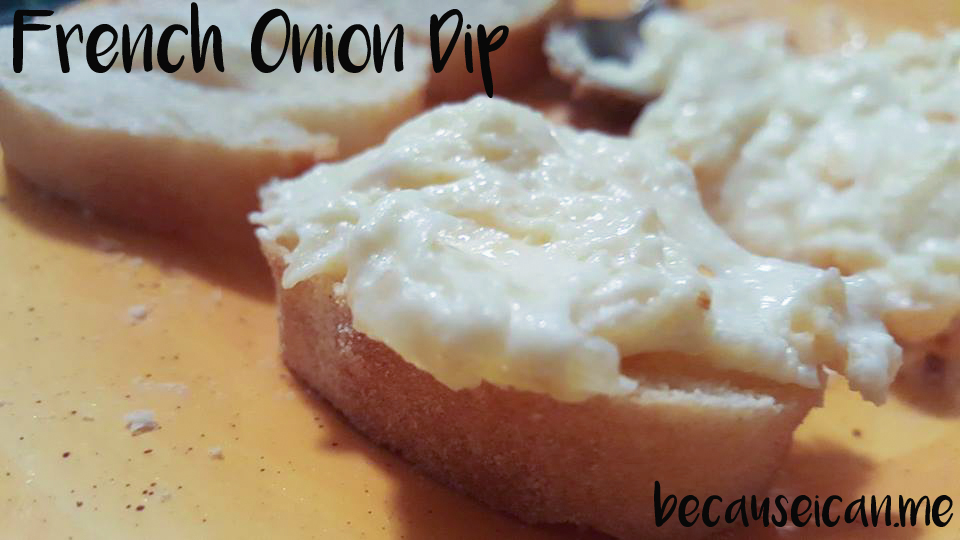
One of my most favorite new-found recipes….. French Onion Dip.

So I was visiting with my friend on the phone a few months back and somehow we always get stuck talking about food at some point in our conversations.

She mentioned that she had made this dip that was so easy and so delicious.  She described it as “1-2-3 Dip” and I do believe I recall her even mentioning it was like crack.

Ummmm…. yes. It’s like crack. I mean, I love eating it on baguette bread the most. But once it’s gone I will put it in celery sticks and then…. I’ll just eat it with a spoon!

It really is that good!

I think it’d be delicious on ritz crackers too. So many options!

So… for all your get-togethers with friends and family, take this dip along. And make sure you take along several copies of the recipe to hand out because they’ll all be asking for it.

French Onion Dip

Ingredients:

  • 3 (8 oz) cream cheese, softened
  • 2 cups shredded parmesan cheese
  • 1 onion, finely chopped
  • 1/2 cup mayonnaise

Directions:

  1. Mix all ingredients together.
  2. Put into an 8×8 or 9×9 glass dish.
  3. Bake in preheated 400 degree oven for 30 minutes.

recipe from Stephanie

http://www.becauseican.me

Much love,

Teauna

Uncategorized

Oatmeal Nut Pie

Oh. My. Goodness!

It’s that time of year when all I want to do is bake.

Give me all the sweet stuff!

oatmeal nut pie slice

And because we are nearing the holidays {I’m not ready}, I thought maybe I should start posting some pie recipes, maybe even do a tutorial or two.

{I need to get brave}

I love making pie! I love making the crust…mmmmm and maybe I make a batch or two extra just for “lady fingers”. My kids and I can devour them in no time. You must be real quick to be able to sneak one out from under us.

This pie is probably my favorite pie…right up there with Strawberry Rhubarb.

So oatmeal pie has been described as the ‘poor man’s pecan pie’.  It is full of a delicious filling containing coconut, walnuts, and of course oatmeal.

My suggestion is that you make 2.  Share one. Hide the other one. Wake up when everyone else is sleeping. Heat it up and add a couple scoops of ice cream. Eat it out of the pan with a fork. And enjoy every last bite!

That’s just my suggestion. {make sure to wash the pan and fork… hide the evidence. They’ll never forgive you} You can thank me later.

Oatmeal Nut Pie

Ingredients:

  • 1 cup light karo syrup
  • 3 eggs, slightly beaten
  • 1 cup brown sugar
  • 1/4 teaspoon salt
  • 1/3 cup butter, melted
  • 3/4 cup coconut
  • 1 cup oatmeal ( I use quick oats)
  • 1/2 cup chopped walnuts
  • 1 teaspoon vanilla

Directions:

  1. Combine ingredients in order given.
  2. Pour into an unbaked 9″ pie shell.
  3. Bake at 350 for 50-60 minutes or until set.

Serve warm with vanilla ice cream. Or eat cold. It’s good no matter how you serve it.

http://www.becauseican.me

Much love,

Teauna


Uncategorized

Fall Decorating: Free Printables

I love fall.

Pumpkins. Corn stalks. Pumpkin Spice Chai Lattes. The colors of changing leaves on the mountains. All of it.

I love all of it.

I love to decorate both inside and outside for most seasons and holidays. I try not to go overboard. Most of all…. I try to do it as inexpensive as possible.

That way I don’t feel guilty when I change things up every year.

One of the best ways I have found to add some décor is by finding some cute printables and printing them off and placing them in cute frames.  I am that girl that buys all the frames in the second-hand store. I like to keep them in a box and when I print something off, I find a frame that’ll work and take it on a date outside with a can of spray paint.

The easiest way to change up décor in a hurry and for a small price is with a can of spray paint.

I have found some adorable FREE printables for you and have linked them below. So much fun!

Simply find one you love, download it and then print it off and place it in a cute upcycled frame.

Voila!

You have a fun decoration that you won’t feel bad about changing up next season, or maybe you’ll keep it around for awhile.

FREE-Fall-Printable pumpkin patch

This adorable Pumpkin Patch sign from Sincerely, Sara D.

OctoberPrintBlog2

I love this Anne of Green Gables quote found at kaylaaimee.

Easy-Fall-Porch-Decorating-Ideas-Chalkboard-Art

This chalkboard design from LollyJane makes my heart happy.

pickuppumpkins8

I’m pretty much obsessed with everything about this cute Pickup and Pumpkins print from my Someday in May.

Fall Subway Art

This Fall Subway Art by The Kurtz Corner is adorable.


Screen-Shot-2017-09-07-at-5.21.44-PM

This sweet watercolor print by Rosewood and Grace is so perfect!


Aren’t these all so stinkin’ cute?

Happy Fall!


Much love,

Teauna


Uncategorized

Korean Beef

Korean Beef

I have to admit… my husband doesn’t ask for much.  I love cooking for him because he will eat anything I put in front of him and he never complains.

He also very seldom requests anything. Well… except for scones. He will request scones.

He has told me of his Grandma’s delicious tuna fish sandwiches, her snickerdoodles that only she could make to perfection and this “Korean Beef stuff” that his mom would make and they’d eat it over rice.

I have seen this recipe floating around the internet and have decided that I needed to give it a try. It seems to have the elements he has explained in the dish his mom once made.  Anything with ground beef… I’m game. It’s simple and it’s filling…and relatively inexpensive.

Win…Win!

Now… I have to explain. We have a schedule that would confuse anyone. Sometimes we wonder who’s coming and who’s going and when and where. But… we seem to make it work.  The mister works night shifts…long ones. So then I work from home when he is sleeping for the most part.  The days he is home, I work in the mornings from home and we usually do yardwork and hang out otherwise. We randomly fall asleep in the middle of the day. On nights like last night I’m up through the wee hours because I am not tired. My body seriously doesn’t know when it’s supposed to be sleeping or awake anymore.

On the days he works I usually have his “lunch” ready around 4:30 so he can get ready and leave by 5:30. It’s crazy some days because I feed him {dinner} but I pack him a {lunch}. Ya know… kinda backwards. But we make it work.

This was super simple to throw together and I cooked Jasmine rice to go with.  That’s our rice of choice around here.

And yes…. I garnished his dinner, because I’m cool like that. {and I needed pics}

Once again, Six Sisters’  recipe is a good one. No surprise.


Korean Beef

Ingredients:

  • 1 lb lean ground beef
  • 1/2 cup brown sugar
  • 1/4 cup soy sauce
  • 1 Tbsp sesame oil
  • 3 cloves garlic, minced
  • 1/4 tsp ground ginger
  • 1/2 tsp crushed red peppers
  • salt and pepper
  • 1 bunch green onions, diced
  • Rice, cooked

Directions:

  1. Heat a large skillet over medium heat and brown beef with garlic in the sesame oil.
  2. Drain most of the fat and add brown sugar, soy cause, ginger, salt and pepper and red peppers. Simmer for a few minutes to blend the flavors.  Serve over steamed rice and top with green onions

http://www.becauseican.me

Recipe from Six Sisters’ Stuff


Much love,

Teauna


Uncategorized

Chinese Cabbage Salad

chinese cabbage saladI love salad.

Cabbage salads. Lettuce. Anything that resembles rabbit food.

I like the sweet salads too. But the green kind are more my style.

Give me all the salads!

The first time I tried this salad was when my Aunt brought it to a family dinner a lot of years ago.  I dug right in and it has been one of my favorites since.  I have changed it up a bit from the recipe I received from her. And sometimes if I want it to be a main dish, I will add cooked chicken to it.

Delicious.

What is your favorite salad?


Chinese Cabbage Salad

Ingredients:

  • 1 head cabbage, shredded or finely chopped
  • 2 packages chicken flavored ramen noodles, crushed (reserve seasoning for dressing)
  • 1 cup salted sunflower seeds
  • 4 green onions, chopped
  • 2 lg carrots, chopped

Dressing Ingredients:

  • 1 cup vegetable oil
  • 4 Tbsp rice vinegar
  • 4 Tbsp sugar
  • 1 tsp salt
  • 1 tsp pepper
  • 2 packages reserved ramen noodle seasoning

Directions:

  1. Place the cabbage, carrots, onions, sunflowers seeds and crushed ramen noodles in a large serving bowl. Mix well. Set aside.
  2. In a medium bowl, whish together all dressing ingredients and pour over salad mixture. Refrigerate several hours before serving.

http://www.becauseican.me

Much love…

Teauna